
Okay so alot of times you see photos online of painted minis on someone’s computer desk or hobby table with a bunch of clutter or computer keyboard and printer in the background. I have posted my fair share of those myself. So I had an idea to create a way to always have a handy place to snap a quick photo of my current painting or conversion project.
I have decided to make a miniatures photo studio. I will cover this project in several blog posts. Today I will list all of the Materials that I will use along with links to where I got them in case you want to make your own studio.
Materials Needed:
In addition to the items listed below I will be using some common hobby tools and materials like white glue, a foam cutter, and x-acto knife.
Project Base
First up is the Scene-A-Rama Large Project Base from Woodland Scenics. The Scene-A-Rama line is marketed from Woodland Scenics for school projects for kids, but it has a lot of small kits that give you everything you need to try a certain technique such as making paster rocks or water effects. I purchased the project base from Hobby Lobby.

Scene-A-Rama Project Base
Sand Textured Paper
Also part of the Scene-A-Rama line from Woodland Scenics, the desert sand paper is pre-cut to fit the Large Project base. I purchased this from Hobby Lobby as well. The same effect could be achieved by gluing sand or ballast directly to the plastic base as well.

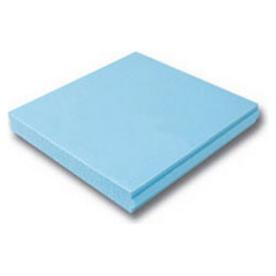
Insulation Foam
The next item is insulation foam. This will be no surprise to veteran terrain makers. Commonly known as “blue foam” or “pink foam” because of the two most common colors that in comes in, insulation foam has been used by hobbyists to make terrain for years. I got mine at Lowe’s but it should be available at any home improvement store.
Model Trees
We will also use some model trees. These are the kind used for model railroading. I bought Woodland Scenics brand from Hobby Lobby, but any model trees will work. Feel free use any of the numerous How to Make Model Trees tutorials that this simple google search turned up if you are more ambitious than me!

Woodland Classics Waters Edge Trees
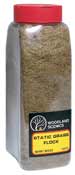
Flocking & Static Grass
Another terrain makers standby, we will use some flocking and static grass to create some grassy areas on the studio platform. I have a bunch from previous projects. Various companies all make flocking that will work, I happened have a big shaker of Woodland Scenics flocking that I am using.
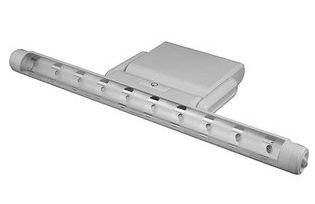
Light
We will need a light for our studio. LEDs are a good choice since they are small and light weight but put out a good amount of light. I got this one from Wal-Mart online.
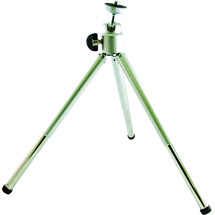
Camera Tripod
The last item is a table top camera tripod. While we will not be physically incorporating this as part of the studio, since we are going to all this trouble to make the studio, why not use a tripod to help us get the steadiest shots possible? I got this one from Wal-Mart online.
That covers all of the items that we will need. Next time I will begin showing step-by-step how to assemble the studio.
Nice work! Looking forward to parts 2 &3.
Thanks! I am planning on one post per week for this project.